
There are many things to consider in creating an excellent animated video. As an animator, you need to craft videos with an engaging story, a well-written script, the appropriate sound effects, and background music, sufficient research, and, of course, the proper animation know-how.
But if there is one thing that ties everything together, it’s the storyboard. Chances are you’ve already heard about storyboarding. But what exactly is it?
Storyboarding is an essential step in animated video production that ensures a well-crafted and coherent animated story. This step refers to creating a series of illustrations to lay out an animated video’s composition of shots, flow, look and feel.
Its very function is to direct the audience’s attention to important scenes and events through character placement, camera movement and positioning, and the use of shadow and light in an animated video.
Storyboards may either be hand-drawn or done through a storyboarding software that produces a comic strip-like format.
Along with that, there’s still much to consider when creating storyboards. In this article, we’ll show you how to make a storyboard for animated videos, step by step.
1) Identify Important Elements in Your Script
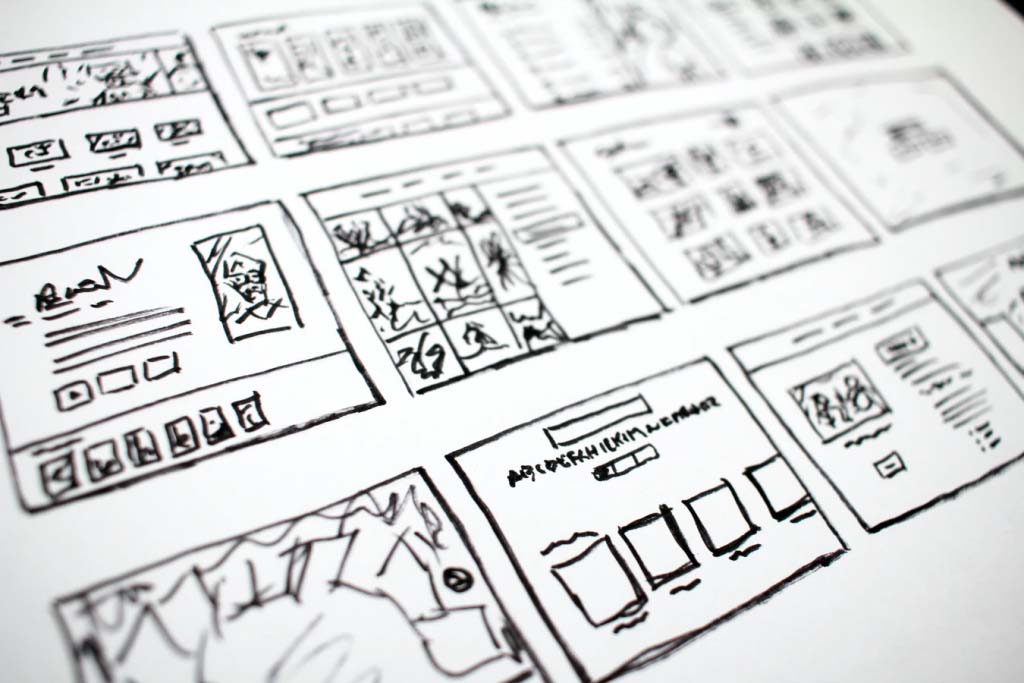
Image by Halacious via Unsplash.com
Before creating a good storyboard for an animated video, you need to have your script finalized. It serves as your vision and starting point as it dictates what details need to be sketched and animated.
Once you have reviewed the script, you can proceed with a process known as “shot breakdown,” wherein you identify the necessary shots and categorize them into their respective scenes before producing the animated video.
Doing a shot breakdown requires you to highlight the key visual details of your story like the characters’ poses, movement, background, icons, text, dialogue, and the timeline during which the events of your animated video will take place.
These elements provide shape to your animated videos and will be included in your animation storyboard.
When doing the shot breakdown, keep in mind the limitations of your animation studio so you won’t go over budget or commit to frames that are too ambitious and time-consuming.
You can ask yourself the following questions:
- What is happening in the scene?
- What exactly are you trying to communicate?
- What should the audience see?
- How should the audience feel?
At this early stage, you can start working on certain aspects needed for your animation storyboard before you make the first few frames.
First, set the aspect ratio of your animated video. The standard aspect ratio is 16:9, but most social media posts utilize either the 9:16, 4:5, or 1:1 ratio.
Second, work on the artistic direction of your animated video by scamping.
Scamping is a raw and rough process done to brainstorm ideas that can best satisfy your client. This is usually done before jumping onto your computer or drawing tablet. It allows you to be more creative with how you want to layout your design.
The layout design refers to how an animation camera works to provide the illusion of dimension and depth.
Overall, this step allows you to explore the possibilities to tell the message your client wants to get across effectively.
2) Craft the First Few Frames When You Storyboard for Animated Videos

Image by lukasbieri via Pixabay.com
After identifying important elements in your script and scamping, it is time to craft the first few frames. This typically refers to the first three to five storyboard frames.
When making the first few frames, there are a number of things you must do.
First, decide whether you want to craft your storyboards digitally or traditionally.
If you’re more comfortable crafting your storyboards traditionally, you can either print different storyboard templates online or start from scratch with a blank piece of paper.
On the other hand, if you opt to make a digital storyboard, there are a ton of digital tools and software you can choose from to help make your thumbnail storyboard:
- Presentation software
- iOS applications
- Graphic design software
- Online storyboard software
We typically advise using a digital storyboard as it makes it easier to edit and revise the frames, replicate the characters, and visualize the animated video. It also allows you to share your storyboard frames with the team more conveniently.
If you decide to create a digital storyboard, you would have the option to use either stock graphics or custom illustrations in illustrating the characters and the background.
Stock graphics are good options as they are inexpensive and convenient. They also result in high-quality professional graphics. According to Mark Wilde, Creative Director of English design agency Rubiqa, using stock imagery is an ideal way to source content for your creative materials.
You can find free stock graphics on the following websites:
You could also buy stock graphics from websites like Storyblocks, Getty Images, and Adobe Stock. Or prepare your own set of stock graphics for your animated videos for a more efficient storyboarding process.
In some cases, the clients provide animators the graphics to be used for the storyboard and the video.
Unfortunately, there are downsides to using stock graphics. They sometimes give the impression of an impersonal look and may even compromise the visual aesthetic of your animated content.
On the other hand, if you aim to stand out from your competitors and impress your animation clients, then you should use custom illustrations.
Custom illustrations help build and secure branding. It ensures you have unique media content that will distinguish you from competitors. In a blog post, writer and animator Celeste Zosimo wrote, “Custom illustrations are a more interpretative form of imagery.”
As you work, keep in mind to incorporate the branding guidelines into the first few frames. This refers to the source materials given to you, such as the brand logo, brand colors, images, font kits, and the illustrations given by your client.
The second step when crafting the first few frames is to clearly illustrate the characters and the backgrounds. After scamping, you should already have an idea of what you want your scenes to look like.
Your main subjects and their respective movements and performances are the most important aspects of a frame, so you must always aim to spotlight them. Remember that the actions and expressions of your characters should keep your animated story going.
There are many rules about arcs, spacing, character energy, and timing to apply when posing a character. Using too many poses can be unnecessary and drag your story while too few poses can be confusing. Only keep the poses and other activities that give your viewers a clear understanding of the scene.
To convert energy in a pose, you can build a line of action. This line of action is the first line being drawn upon which the energy of the character is built around. Its purpose is to communicate the direction of movement and emotion in a character.
Good character posing conveys the appropriate action, motivation, emotion, and body type, resulting in a pleasing rhythm and flow.
Always pay attention to the spacing of your characters’ movements in a scene as spacing issues can be distracting. This can result in an unconvincing and unrealistic animated video.
If you are having trouble visualizing the scene or your characters’ movements, you can take a step back and observe your surroundings. This will enable you to animate more realistically.
You could also film reference shots of yourself acting like the character you intend to animate.
Meanwhile, illustrating your character’s background would help orient your audience and identify the relation between your subjects and their physical space. That is why you should illustrate backgrounds that are logical and would help in telling the story.
For instance, in scenes that focus on character expression or movements, you can sketch a simpler background with lines and minimal figures.
Backgrounds may either be simple or elaborate. In some cases, your background may not even be stagnant. While your characters are moving in their center, different activities may also occur in the background.
The third step following the illustration of your characters and the background is to incorporate movement. When you incorporate different movements, you are adding both camera and object motion to an otherwise still scene.
GIF by plotdevicesco via GIPHY.com
Adding motion is important because it enhances the impact, momentum, pacing, and energy of a scene. It also helps the audience identify key scenes and subjects in your animated video.
Adding camera and object movements sets up how the viewers will see your animated video unfold. To add camera movements in your animation storyboard, use arrows for the following camera moves:
- Pan right: Arrows pointing right at the top and bottom of a frame indicate horizontal camera movement to the right.
- Pan left: Arrows at the top and bottom of a frame pointing left indicate horizontal camera movement to the left.
- Tilt-up: Curved arrows pointing upward indicate camera movement tilting up.
- Tilt down: Curved arrows pointing downward indicate camera movement tilting down.
- Zoom in: Four inward-pointing arrows in any part of the frame indicate a zoom in on the area.
- Zoom out: Four outward-pointing arrows in any part of the frame indicate a zoom out on the area.
- Rotate: A circular arrow indicates rotation in either a clockwise or counter-clockwise direction.
3) Add the Animation Ideas and Illustrations From the Script

Image by willfrancis via Unsplash.com
While a storyboard is a visual tool, according to Michael Quoc, CEO of Global Social Media Community Dealspotr, you will still need to add the different non-visual cues to get the best result.
That’s why it’s important to add the dialogue, voiceover narration, animation ideas, and illustrations from your script to the different frames in your storyboard.
You can insert directional notes or any other minimal text at the bottom of the frame to express the scene more clearly or give context to its backgrounds, such as the preferred angle or camera movement.
4) Organize Your Storyboard Files

Image by briannjoness via Unsplash.com
Creating the first few frames doesn’t simply end with putting everything on the storyboard. As an animator, you must keep one thing in mind while working on your storyboard files –– a logical and organized system.
Organizing your storyboard files will help you if you wish to reference specific frames or revise and re-edit certain sequences.
To effectively do this, create a single folder that will serve as the sole location for the animation project. It must be accessible to the rest of your team. Sub-folders for different categories, such as backgrounds and graphics, can be added here.
Rename the different folders and storyboard frames in a way that is specific and logical. You may rename it to the project or client name.
Or you can put all your frames and scenes in numerical or alphabetical order so they don’t get mixed up. When naming your files, avoid using abbreviations or complicated jargon.
Also, use underscores when separating sentences as some operating systems do not allow spaces in file or folder names.
According to small business writer and consultant Susan Ward, “The goal when renaming files is to be able to tell what the file is about without having to open it and look”.
When organizing all your storyboard files, you can also use this as an opportunity to check the consistency, pacing, and impact of your story.
Here, you can thoroughly observe any continuity errors or logical gaps in your digital illustrations. Also, try to put yourself in the position of your audience to check how compelling the animated video appears.
After gathering all the files and naming them correctly, declutter the folders by deleting files you no longer need. You may even opt to have a sub-folder for trash so that you can review them before deleting them.
5) Ensure Approval from Your Team and Your Animation Client

Image by Canva Studio via Pexels.com
Once you have organized all the storyboard files, we advise you to seek feedback and approval from the rest of the team and your animation client. This ensures that all grounds have been covered and that any improvement may be implemented right away.
It’s crucial to wait for their feedback and approval before creating the rest of the animation storyboard so that you won’t be wasting any time on frames your clients may not like.
Before seeking client approval, make sure you applied the overall branding guidelines and followed the creative brief given by your client. Always remember to include the logo of your animation studio to the storyboard document.
After that, upload the first few frames in a PDF format and rename the files accordingly.
Once everything has been accounted for, you can finally send the storyboard files to your animation client via email or the project management tool of your choice.
6) Complete the Full Storyboard

GIF by theoffice via GIPHY.com
As soon as you have received approval from your animation client, apply any additional input they have provided and proceed to working on the full storyboard.
Use the shot breakdown as your guide as you continue illustrating the different characters, backgrounds, and their respective movements. Also, paste the rest of the voiceover script and the animation ideas on the storyboard frames.
7) Clean Up, Revise, and Edit

Image by Szabo Viktor via Unsplash.com
Now, you can revisit everything you did, double-check for any errors or inconsistencies in your frames, and ensure the guidelines and feedback sent by your client were followed and adhered to.
If everything is up to the standards of your team and your client, clean up any unnecessary details and submit the full storyboard to your animation client using the same organization tips and tools.
Once the full storyboard has been approved by your client, you can finally start the video production process.
Why You Should Storyboard for Animated Videos and How
Creating a storyboard is no easy feat, but it’s crucial to producing excellent animated videos.
As an animator, using storyboards translate the words on your animation script into coherently sequenced illustrations. A good storyboard results in an animated video that effectively directs your audience to key scenes and tells an impactful story.
In doing so, identify the important elements of your script in a process known as “shot breakdown,” which will be used in creating a rough sketch of the storyboard.
Afterward, start working on the first few frames. This refers to choosing the tool where you’ll craft your animated storyboard, incorporating your brand guidelines, illustrating your characters and their backgrounds, adding camera movement, and organizing everything neatly and logically.
When that is done, ensure client approval by submitting the first few frames. Don’t forget to change the storyboard file names with each revision.
Once it has been approved, work on the complete storyboard, and, eventually, clean it up and make the necessary edits.
While there are many things to consider when making good storyboards, remember that this step will not only ensure a smooth video production process but will help you create excellent animated videos that will stand out from competitors and increase sales.
For more tips on developing your skills as a freelance animator or animation studio owner, join our informative free masterclass and download a copy of our free marketing handbook.